- extreme Makeover März 2018
- Simple client/server
- Dealer Key
- ODBC 64/32 bit
- ODBC Driver
- JavX on PDA
- Pseudo Printer
- Ring Bell under XP
- Search Rules
- Convert to ProvideX
- WindX
- Webserver
- ASCII Files
- LINK Files
- Windows Printing
- Activation problems
- POS function
- Select verb
Schnell und einfach Ihrer Anwendung ein anderes Aussehen geben?
Das ist mit „Themes“ und „Visual Classes“ möglich.
Themes sind die früheren Templates. Sie bestimmen das Aussehen von Objekten in einer ganzen Library.
Sie werden daher auch in die ‚Library defaults‘ aufgenommen. Visual classes beziehen sich auf ein
einzelnes Objekt. Sie müssen sie daher für jedes einzelne Objekt einstellen.
In diesem Beispiel arbeiten wir nur mit Buttons, aber andere Objekte können auch.
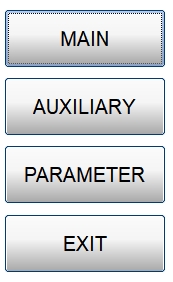
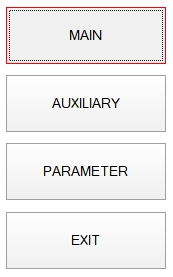
Wir nehmen diese Buttons als Beispiel:
Font: Arial, 20 points
Foreground : default
Background: default
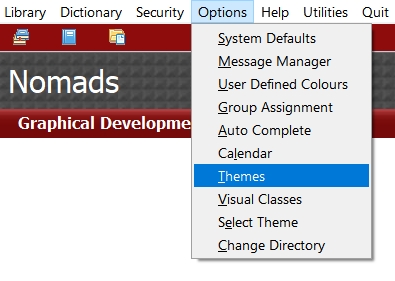
Wir werden jetzt ein „Theme“ machen.
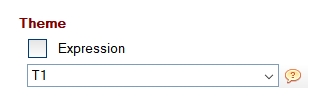
Dazu starten wir Nomads und wählen im Menü > Options > Themes
Sie wählen als Theme „T1“ und Kontrolltyp: Button
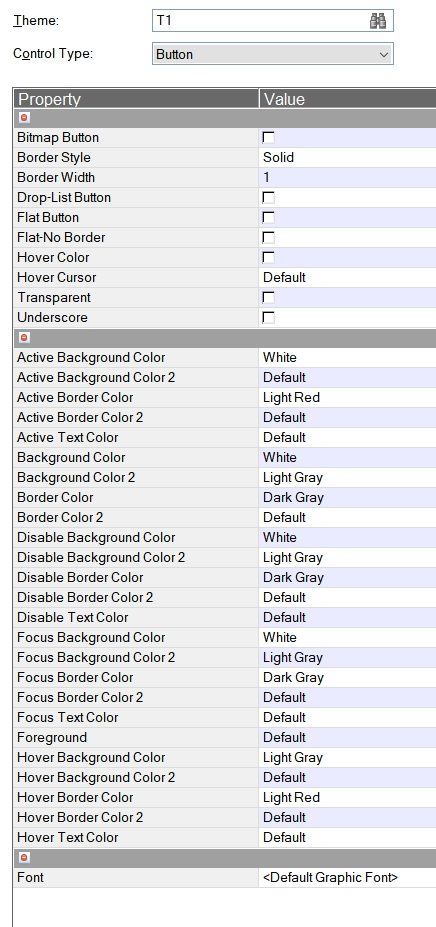
Sie sehen eine Reihe zusätzlicher Optionen, die Sie normalerweise nicht für eine
normale Schaltfläche auswählen können. Zum Beispiel ‚Hover Border Color‘
Das Ziel ist, einen roten Rahmen um den Knopf zu erhalten, wenn Sie die Maus über die Schaltfläche schweben.
In diesem Beispiel werden noch mehrere Farben angezeigt.
Dieses Theme „T1“ verlinken wir zu unserer Library, über „Library Defaults“.
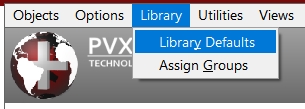
Wählen Sie dann die TAB ‚Font/Clr‘ und wählen Sie T1
Wenn wir jetzt das Panel mit Buttons starten und wir mit der Maus über die Buttons bewegen, dann
sehen wir hauptsächlich, dass die Knöpfe rot umrandet sind. Sie sehen auch eine andere Schriftgröße,
andere Farben und schärfere Ecken. Alle unsere Knöpfe in allen Panels erhalten jetzt diesen Look.
Manchmal möchten Sie jedoch, dass bestimmte Schaltflächen anders aussehen. Darum ‚Visual Classes‘.
Wir gehen zurück zum Hauptschirm, und wählen menu > Options > Visual Classes
Wir wählen als Namen ‚BLUE‘, theme: ‚T1‘, control type: ‚Button‘
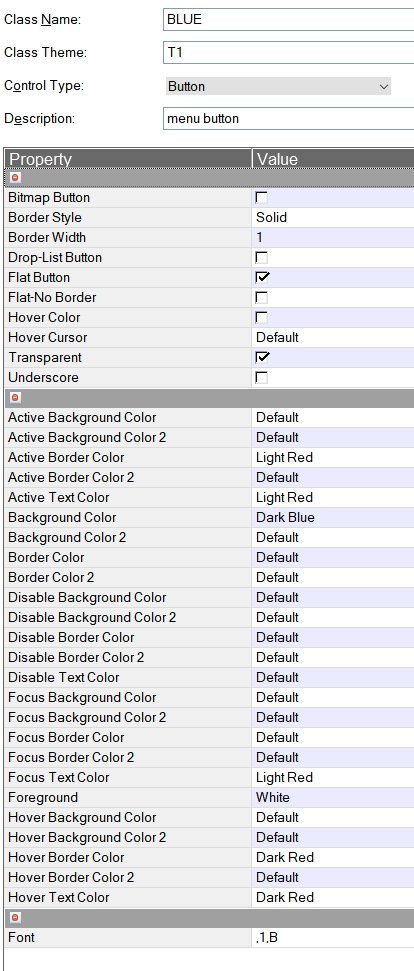
Die gleichen Eigenschaften wie bei einem Theme kommen jetzt zurück. Wir wollen jetzt Ein flat,
transparant button welche als Hintergrund dunkelblau ist mit rotem Text wenn das den Fokus hat, und
dunkelroten Text wenn Sie die Maus darüber bewegen.
Möglicherweise müssen Sie verschiedene Einstellungen versuchen mit Trial und Error.
Wir behalten diese Einstellungen und jetzt in unserem Panel pro Button diese visuelle Klasse ‚BLUE‘ einstellen.
Wählen Sie die Eigenschaften Ihrer Schaltfläche. Wählen Sie die tab „Font/Clr“ und select „BLUE“ bei Visual Class.

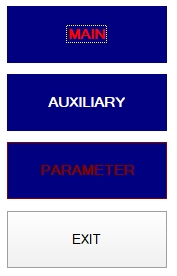
Das machen wir auch für die Schaltflächen „Auxiliary“ und „Parameter“, aber noch nicht für ‚Exit‘,
um den Unterschied klar zu sehen. Wir werden unser Panel neu starten.
Wenn Sie mit der Maus über ‚Parameter‘ bewegen, ist dies das Ergebnis:
PxPLUS simple Client/Server
PxPLUS has developed an alternative for *NThost/*NTslave. The advantage is that the host needs only 1 tcp socket. That is interesting if you connect via the Internet and thus you need to open only 1 port in your firewall. PxPLUS uses port 4093 by default. They obtained this portnumber by IANA (Internet Assigned Numbers Authority). To start the host. Save this script in /usr/local/bin/starthost on your Unix machine: #!/bin/sh PVXLIB=/pxplus/lib PVXFLMAP=\\/ export PVXLIB PVXFLMAP umask 0 cd /pxplus {su username} /pxplus/pxplus -dr=/pxplus/ \*plus/cs/host -arg 4093 {forced program} >/dev/null </dev/null 2>&1 and change permissions with ‚chmod 777‘ Add this line to /etc/inittab of the Unix machine: pxp1:2345:respawn:/usr/local/bin/starthost </dev/null >/dev/null 2>&1 [ Note for SCO OpenServer 5 users: I usually include this line below the ‚r3‘ line in /etc/inittab ]. Please note that when the kernel environment is rebuild (after linking a new kernel for example), SCO will remove this line from /etc/inittab. Save /etc/inittab and enter ‚telinit q‘. You’ve now started a PxPLUS host program on your Unix machine (using socket 4093) that will wait for *plus/cs/CLIENT WindX connections. Please note that on some Unix machines, you will need to reboot in order to have Unix accept this additional inittab line. If you are using a Linux OS, you will notice that the inittab file is not in use anymore. In order to have the script autostart when the machine boots, you can use one of the following: 1. There’s a /etc/init.d/boot.local script. Add the following line to that script: sudo -uuser /usr/local/bin/starthost & 2. There’s a /etc/rc.d/rc.local script. Add the following line to that script: su user -c /usr/local/bin/starthost & ‚user‘ is a login name from ‚/etc/passwd‘: This user (or the one that you select) *MUST* be available in /etc/passwd. Verify that you can login and start PxPLUS with this user. If you want to start the host automatically (as a service) in a Windows environment, use *plus/cs/service. This program asks for a starting directory, tcp port and which program to start. Then you need to go to ‚control panel‘ > ’services‘ and change the status from ‚manual‘ to ‚automatic‘.
To start a client Create the following shortcut on your Windows desktop to make a WindX connection: Target : C:\pxplus\pxplus.exe *plus/cs/client -id=Txx -arg xxx.xxx.xxx.xxx[;ssss] [progname] Start in: C:\pxplus Minimized xxx.xxx.xxx.xxx is the IP-adres of the host machine. ssss is the socket number the host is using. Default=4093 -id=Txx is the value of FID(0) progname is the name of the program to start when a connection is established. If empty, PxPLUS starts in ‚console mode‘. If you want to start PxPLUS sub-processes from this kind of connection, you still can use CALL „*windx.utl;spawn“.
Dealer Key
Besides to protect your programs with a password, there is also the possibilty to protect your application with a Dealer Activation Key. When the activation file contains the correct key that corresponds to the dealer number, stored in your program, only then your programs will be executed. To be able to generate such a key, you need to buy a ‚dealer key kit‘, and it consists of 3 items: 1) You will receive a key generator program with which you will be able to generate your own dealer keys. (an executable for 13/32 bit and a DLL for 32/64 bit environments) 2) You will also get an identification file. This (small) file is used by the generator to create a unique key. You may never change this file once you started generating dealer keys. The key generator can produce 2 kind of keys: developer keys and runtime keys.
- A developer key is used on the developing computer to be able to SAVE, EDIT and LIST your programs.
- A runtime key is used on the end-users computer to run the software that is protected with a dealer key. During the this process, one can add extra options to the runtime key to enable LIST and/or EDIT.
The keys are based on the ’system id‘ of the machine and are therefore different for each computer. 3) You will also be assigned a unique package number. To add the above keys to the activation file, you use the normal activation program: pvxwactv.exe (windows) or pvxactv (linux/unix). After the activation is done with the ‚dealer key‘ package, programs kan be saved and protected with the command SAVE „program“,OWN={unique package number}. If you want to protect all of your programs with the dealer key, you can set parameter ‚OW’={unique package number}. Now, every program gets the dealer key when it’s saved, even if you save it without the OWN option. The developer also has the ability to assign 25 different flags, and each of them can be added to a program by means of SAVE „program“,OWN={unique package number},FLG={1{:2{:3{:…..{:25}}}} }. For example, programs from the group ‚general ledger‘ can be assigned FLG=1. Programs from the group ‚account payable‘ can be assigned FLG=2, etc… Only runtime licenses generated with the correct flags can execute these programs. ie. A runtime license, activated with flags 1:3, will not be able to run a program saved with FLG=2. For information about the price, please contact our sales department.
ODBC 64 bit and 32 bit drivers
1) There are two types of ODBC connections supported by the PxPlus ODBC workstation driver
a) A simple client connection whereby the ODBC driver runs on the workstation and directly accesses the files as either local files or mapped drives.
b) A server connection whereby the ODBC driver connects to a server on another machine which in turn accesses the files.
2) We supply workstation drivers in either 32 bit or 64 bit form.
The 32-bit driver can be installed and used on either a 32 bit or 64 bit Windows system.
The 64 bit driver can only be installed on a 64 bit Windows system.
3) The 32 bit workstation driver can only be used by a 32 bit application and the 64 bit workstation driver can only be used by a 64 bit application.
NOTE: Microsoft still recommends that users install 32 bit Office regardless of whether the Windows system is 32 or 64 bit.
See: http://office.microsoft.com/en-us/products/office-2010-frequently-asked-questions-HA101674631.aspx#About_Office_2010_4
4) By default, the Windows ODBC configuration utility will ONLY recognize drivers of the same type as the Windows OS. That is the Windows ODBC configuration utility on a 64 bit Windows system will only allow access to 64 bit workstation drivers. To configure 32 bit ODBC drivers on a 64 bit Windows system you must use the ODBCAD32.exe program found in the windows SYSWOW directory.
NOTE: That to make this easier, when installing the current PxPlus 32 bit driver on 64 bit systems, we automatically create a shortcut to the proper configuration utility for the user.
5) When connecting to a server (‚b‘ in item 1 above), the type of workstation driver (32 or 64 bit) is immaterial to server just as the type of server is immaterial to the workstation driver. All communication between the two is over the network using TCP/IP thus the type of client or server does not matter. Simply put, a 64 bit workstation driver can connect to a 32 bit server and a 32 bit workstation driver could connect to a 64 bit server (if one existed).
ODBC Driver – What it is – What you need – How to activate
The PxPLUS ODBC driver allows access to PxPLUS data files from any Windows product that supports an ODBC interface. The PxPLUS ODBC driver is a Windows only product, which means that the driver can only be installed in a Windows environment. Depending on where the data is located, you will either need a PxPLUS Local ODBC driver or a PxPLUS Client ODBC driver.
If the Windows PC on which you will install the ODBC driver has direct access to the PxPLUS data files through either a local drive or a mapped network drive, you can install the ‚Local‘ ODBC driver. Note that this product must be activated on each PC it is installed on. If the PxPLUS data is located on a server that doesn’t allow you to map its drive (say for example a Unix server), you will need to install a PxPLUS ODBC Server on the server and a PxPLUS Client ODBC driver on each PC that needs to access that server. In this scenario, only the PxPLUS ODBC Server needs to be activated – the PxPLUS Client ODBC drivers don’t require activation at all (just like a WindX Plugin doesn’t need to be activated and gets its activation from the server).
Note that if a Local ODBC driver is accessing data on a networked drive, the performance can be less than optimal (due to the amount of data that will be transferred across the network). You can decrease the network traffic by installing a PxPLUS ODBC Server on the machine that hosts the data (provided that machine is running an operating system that is supported by the PxPLUS ODBC Server – please visit our ODBC download page for a list of supported operating systems).
Activation of the PxPLUS ODBC Local driver and/or PxPLUS Windows ODBC Server is quite easy: during installation of these products, the installer will ask for a serial number, user count and activation key. If you are installing at a site that is running a PxPLUS Professional or E-Commerce license, the serial number, user count and TEMPORARY activation key of that product must be entered in the activation dialogue (don’t worry – although you are entering a temporary key, the product will activate permanently). In case the site is using a PxPLUS Base license or no PxPLUS license at all, you need to contact EDIAS Sales and either order an ODBC Local Driver or ODBC Server serial number and activation key.
ODBC v5.xx needs a PxPLUS v10 key or higher.
ODBC v4.xx needs a PVX v9, v8 or v7 key.
The PxPLUS Windows ODBC Server can also be activated from the Windows Control Panel by starting the ‚PxPLUS File Server Settings‘ wizard and selecting the ‚Activation‘ tab.
A Linux/Unix ODBC Server must be activated by manually changing the ‚pvxiosvr.conf‘ file in the directory where the ODBC Server was installed. You should start by copying the ‚pvxiosvr.conf.sample‘ file to ‚pvxiosvr.conf‘. In the ‚.conf‘ file, one must create a new line that uses this syntax: serial=serno-usercount-actkey (for example: serial=12345-5-ABC0123456789DEF). The serial number, user count and activation key are (just like with the Windows ODBC Driver/Server) the serial number, user count and TEMPORARY activation key of the PxPLUS Professional or E-Commerce license that is running at that site. In case the site is using a PxPLUS Base license or no PxPLUS license at all, you need to contact EDIAS Sales and order an ODBC Server serial number and activation key.
Note: On a Windows 64bit OS, the 32bit ODBC administrator is needed, and can be found as C:\windows\syswow64\odbcad32.exe
How to setup JavX on a PDA
You will need a J2ME Personal Profile Java Runtime Environment on your PDA in order to start JavX. If you already have such a JAVA version installed, you can skip the downloading and installing of the IBM WebSphere Java as explained below.
To install IBM WebSphere Java on your PDA, you must download that Java version from this site and store it on your DESKTOP PC.
(Click on ‚Download Trial‘).
Then connect your PDA to your desktop PC and start the Microsoft ActiveSync application. Install the IBM Java you just downloaded on both your desktop and PDA.
I assume you know that the PDA must be a wireless client. If not, you can stop right now.
Okay, you’ll need the Direxions 2005 CD. Put that CD in your desktop PC and install both ‚PxPLUS v7 for Windows‘ and ‚JavX v2.5 Developers Kit‘ on your desktop PC. Make sure you still have an ActiveSync connection between the PDA and the desktop PC. Start PxPLUS V7 and go to the directory (CWDIR) where you installed the ‚JavX v2.5 Developers Kit‘. Underneath that directory, there should be a ‚JavXPDAWiz‘ directory. Use CWDIR to switch to that directory. Then enter RUN „JAVX.PGN“.
A graphical window should appear in which you must enter the IP address of the nthost or application server. Also enter the socket number that nthost/appser is using and select if your server is running nthost or the application server. Then click NEXT.
In the next window, it will say that JavX will be installed in the \JAVX directory and that the program will create a shortcut in the PROGRAMS group of your PDA. You need to click INSTALL here. If you get a ‚NOT ON CRADLE‘ error message, select ‚Device Information‘ from the menu, close that window and try INSTALL again.
JavX will now be copied onto the PDA and a JavXAE shortcut will be created in your PDA Programs group. The next window will display some registry settings, you need to click INSTALL here as well. Then click EXIT to leave the installer.
You can now disconnect the PDA (close ActiveSync). Click Start/Programs (on your PDA). There should be a JavXAE icon. Click that and JavX will try to connect through the wireless TCP connection to your nthost/appser server.
Now, in case you are NOT using an English/US Windows OS on the PDA, or in case your are NOT using the IBM WebSphere Java, you need to execute the following step to fix a path problem in the JavXAE link that was created on the PDA:
Connect the PDA to your Desktop and start ActiveSync. Use Explorer to browse the PDA and go to the \windows\start menu\programs directory (or whatever it is called in a On-US Windows Mobile OS) . Copy the JavXAE link into a directory on your Desktop PC and open it there with NOTEPAD (start Notepad and use the File/Open menu item to open it). It will probably look something like this:
109#“\Program Files\J9\PPRO10\bin\j9.exe“ „-classpath“ „\JavX\JavXAE.jar“ „-jcl:ppro10“ „localNetworkClientTest“ „server=192.168.2.102; port=20000; guifactoryclassname=AWTGUIManagerFactory“
Now change the \Program Files\ path to the correct path where IBM J9 is installed. Save the changes, and drag the link file back into the PDA \windows\start menu\programs directory. Disconnect the PDA and try to start the JavXAE link.
Window’s Printer Mapping to a PxPLUS Device Driver
A new feature has been added in PxPLUS v6.10, where a Windows Printer may be defined on a PC so that it appears in the Windows Printer Selection Dialogue, and if that printer is selected from within a PxPLUS session, then PxPLUS attempts to re-route the printer to a device driver.
This allows Developers to create Windows Printer’s on workstations for items such as the Preview, PDF, or HTML output from PxPLUS.
This feature works based on the name and properties of the printer.
- The printer must have an output port of „NUL:“
- The second word in the Printer’s Name, will be parsed out and an underscore will be added to the beginning and end of the name. The PxPLUS LIB directory will be scanned for a device driver that matches this name. If the device driver is not found, then the printer will not be mapped anywhere, and will simply output to NUL. EXAMPLE:
Printer Name: „PxPLUS Viewer“
A search of the PxPLUS Lib Directory for „_viewer_“ will be made.EXAMPLE:
Printer Name: „PxPLUS PDF“
A search of the PxPLUS Lib Directory for „_pdf_“ will be made.
Follow the next steps to add such a Printer to a Windows XP Workstation:
- Go to Window’s Printer’s and Faxes.
- Select „Add a printer“.
- Select „Local printer“.
- Check the „Use the following port“ for an entry of „NUL:“.
if „NUL:“ exists, select it and go to Step 8. - Select „Create a New Port“.
- Set the „Type of Port“ = „Local Port“.
- For „Port Name“ enter „NUL:“ (without the quotes).
- From the manufacturer / printers dialogue, select „Generic“ for a manufacturer and „Generic/Text Only“ for the printer.
- Select „Keep existing driver“
- Enter a name for your printer, keep in mind, that the 2nd word in the name is what must match the device driver.
For this „Printer Name“, enter „PxPLUS Viewer“ - For the „Set as default printer“, select „No“.
- For „Sharing“, select „No“.
- For „Print a test page ?“, select „No“.
- Check your settings and Select „Finish“.
You should now have a printer named „PxPLUS Viewer“ as one of this workstation’s printers. From within any PxPLUS application, you will see this printer in the *WINPRT* printer selection dialogue. Whenever this printer is selected, PxPLUS will re-route the printer to the specific device driver.
In the case of our example, we have created a printer named „PxPLUS Viewer“ which is connected to „NUL:“. If selected from Printer Selection, PxPLUS will automatically close „*WINPRT*“ and open the file „*VIEWER*“ instead.
NOTE: This will ONLY work in PxPLUS applications!
If the user selects one of these special PxPLUS mapped printers from another application (Word, Notepad, etc.), they will get NO output.
How to hear ‚RING BELL‘ in Windows XP.
Follow these steps to hear the audible bell (‚RB‘) in Windows XP.
- Add a new key in the registry.
\HKEY_CURRENT_USER\AppEvents\Schemes\Apps\.Default\.Default - Start ‚Control Panel‘ > ‚Sounds and Audio Devices‘
Select the ‚Sounds‘ tab and search for the Windows ‚Default Beep‘ line in the listbox.
Select your preferred .wav file. (i.e. ding.wav) - Turn on your speakers.
- Start PxPLUS in console mode and type PRINT ‚RB‘ or hit the [BackSpace] key.
How PxPLUS finds and saves your files and programs.
First thing to know are the verbs, functions and parameters that are necessary to understand the search rules of PxPLUS.
‚CD‘ parameter.
The ‚CD‘ parameter is default ‚OFF‘, which means the current directory is searched after the PREFIXes. If set to ‚ON‘, PxPLUS checks the current directory before checking the PREFIX list for a file.
(see below for ‚Search Rules‘)
You can check the value of the parameter by using : PRINT PRM(‚CD‘)
and you can set the parameter by using: SET PARAM ‚CD’=1 (or 0)
PREFIX
You can compare the PREFIX with the PATH variable in MS-DOS or UNIX.
Use the PREFIX directive to define a series of search paths to be inserted in front of all relative file references used in OPEN / LOAD / RUN / CALL / PERFORM directives.
(PxPLUS OPENs files with absolute paths directly, without performing a search.)
Example:
PREFIX „/usr/mydir/data/ /usr/mydir/prog/ /usr/mydir/sub/ D:/other/data/“
Different paths must be separated by a space.
As you can see, you can add a drive letter before a directory, to indicate to search a different drive than specified with the SETDRIVE verb.
You can specify up to 10 differently numbered PREFIXes, i.e. PREFIX (0) through PREFIX (9).
Example:
PREFIX (0) „/usr/mydir/data/“
PREFIX (1)“/usr/mydir/prog/ /usr/mydir/sub/“
PREFIX (2)“D:/other/data/“
The advantage is that you can DISABLE and ENABLE a specific PREFIX.
i.e.: DISABLE 2, disables the search in D:/other/data/.
PREFIX (0) “ … “ is the same as PREFIX “ … “
If you need to include a space within a directory name, then that directory location must be enclosed in double quotation marks.
For example:
PREFIX „C:/Tmp/ C:/usr/ „“C:/Program Files/“““
PRINT PFX or PRINT PFX (n) prints the value of the PREFIX.
EQUALS signs for special matching.
Equals signs in your PREFIX have special meaning. Each character of the filename that corresponds by position to an equals sign will be used to form a subdirectory name to be used in the search. For instance, if you include 1 equals sign, PxPLUS will interpret that to mean that the first character of your filename is also the subdirectory name. If you include 2 equals signs, it will take the first 2 characters as matching the subdirectory name, and so on.
The purpose was to split up large directories, inherited from other Business Basics, into smaller ones for faster access and better management.
Example:
Suppose your application consists of more than one module. The program name indicates to which module they belong. i.e. GL001 GL002 GL003 belong to the module ‚General Ledger‘ and AR001 AR002 … belong to the module ‚Account Receivable‘. Then you can split your directory into separate subdirectories. The name of these subdirectories must be the same as the first corresponding characters of the module, in our example GL and AR.
When looking for a program or file, PxPLUS evaluates the initial two characters as matching characters and uses them as the name of the subdirectory where the search will commence for relative file references.
For example:
PREFIX „/myapp/==/“
OPEN (1)“ARHIST“
PxPLUS evaluates the filename ‚ARHIST as /myapp/AR/ARHIST for purposes of the initial search.
Asterisks as PREFIX Wild Cards.
You can also use * and ** as wild-card characters to support the use of filename extensions without modifying your code. This feature was added to the PxPLUS language as of Ver. 4.20 primarily for WINDOWS 2000 users, since the Microsoft Certification rules for WINDOWS 2000 require that all files have file extensions. With the wild-card characters, you can rename your files on disk with a common file extension without modifying your program code.
Using a single asterisk (*):
If your PREFIX directive includes an asterisk plus a specified extension as a filename, PxPLUS inserts the filename from your OPEN command in place of the asterisk and searches first for your filename with the extension you specify in the PREFIX.
For example:
PREFIX „/mydir/*.dat“
OPEN(1)“customer“
PxPLUS will scan the disk for „/mydir/customer.dat“ and OPEN that file if found. If ‚customer.dat‘ is not found, PxPLUS will attempt to find and OPEN a file named „customer“.
Note!
KEYED „abcde“,5 will not create a file named „abcde.dat“ , but
ERASE „abcde“ will erase a file named „abcde.dat“!
Using two asterisks (**):
If your PREFIX directive includes two asterisks plus a specified extension as a filename, the substitution described above for a single star will occur only if your OPEN directive includes a simple filename (i.e., a filename without an extension). If your filename is complex (e.g. customer.hist), no substitution occurs.
For example:
PREFIX „/mydir/**.dat“
OPEN(1)“customer“
OPEN(2)“customer.hist“
Since OPEN (1)“customer“ contains a simple filename, PxPLUS will look first for „/mydir/customer.dat“, then, if not found, for „customer“.
Since ‚customer.hist‘ is a complex filename and two stars are used in the PREFIX filename, PxPLUS doesn’t add a .dat extension to customer.hist when it executes the search to find and OPEN the file.
PREFIX PROGRAM
Use the PREFIX PROGRAM format to define the search location(s) PxPLUS will search first when it attempts to LOAD, RUN, CALL, PERFORM or SAVE programs.
For example:
PREFIX PROGRAM „/pvx/mydir/pgm/“
to examine this prefix :
PRINT PFX(PGN)
PREFIX FILE
This is not the counterpart of PREFIX PROGRAM!
Use the PREFIX FILE format to do dynamic translations of filenames in your applications by defining a KEYED file as a lookup table. Any file you define as a PREFIX FILE must be a variable-length KEYED file or PxPLUS returns an Error #17: Invalid file type or contents.
If you define a PREFIX FILE, then PxPLUS searches this special KEYED file for a search location whenever it encounters an OPEN command with a relative filename, using the filename in your OPEN directive as the key to the PREFIX FILE. (Reminder: PxPLUS OPENs filenames with absolute paths directly, without performing a search.) The normal PREFIX search rules still apply after a filename has been located in the PREFIX FILE.
When you write to this special KEYED file, treat the filename from your program’s OPEN command as the KEY. The data record for each key contains the true filename you want opened instead. (PxPLUS retrieves the data record internally with a READ RECORD.)
Example:
KEYED „fileprefix.dat“,25
OPEN(1)“fileprefix.dat“
WRITE RECORD(1,key=“customer“)“[odb]ACCESS;CUST;KEY=CUSTNO“
CLOSE(1)
……
PREFIX FILE „fileprefix.dat“
OPEN(1)“customer“ ! Internally this becomes
>> OPEN(1)“[odb]ACCESS;CUST;KEY=CUSTNO“
So you don’t have to change anything in your programming code, to alter your type of database. You only have to prepare the keyed file from the PREFIX FILE.
As of version 4.23, a second field is allowed in the keyed file for PREFIX FILE. This is an OPTIONS field. These OPTIONS are put into the OPT= for the OPEN of the real path/filename. The above enhancement allows an OPT= on the original OPEN, where the additional OPT= is appended to any of the options from the second field of the PREFIX FILE record.
Example:
PREFIX FILE contains the following:
Key=“GLMAST“, DATA RECORD=“[ODB]DSN;TABLE“+sep+“KEY=field1″
If you OPEN(chan)“GLMAST“
internally PxPLUS will:
OPEN(chan,OPT=“KEY=field1″)“[ODB]DSN;TABLE“
If you OPEN(chan,OPT=“REC=somedata“)“GLMAST“
then internally PxPLUS will:
OPEN(chan,OPT=“KEY=field1;REC=somedata“)“[ODB]DSN;TABLE“
You can obtain the PREFIX FILE value by using PRINT PFX(-1).
SEARCH RULES
The PxPLUS default is to search all prefixes, in the following order:
For OPEN directives.
1) PREFIX FILE, if set. (Replaces pathname then continues sequence)
2) Current Directory (if ’CD’ parameter is set)
3) PREFIX 0 to 9
4) PROGRAM PREFIX, if set
5) Current Directory (if ’CD’ parameter is not set)
For LOAD / RUN / CALL / PERFORM / SAVE directives.
1) PREFIX FILE if set (Replaces pathname then continues sequence)
2) Program Cache
3) Current Directory (if ’CD’ parameter is set)
4) PREFIX PROGRAM if set
5) PREFIX 0 to 9
6) Current Directory (if ’CD’ parameter is not set)
The PREFIX search rules apply not only to files being found, but also to files being created. PxPLUS creates files in the first location that is permitted by the PREFIX rules. If ’CD’ (Search Current Directory) parameter is set, then all files are created in the current directory (the first permitted location). If the ’CD’ parameter is not set, then PxPLUS creates your file in the first location permitted by the search rules above.
You can use the ENABLE and DISABLE directives to control which of the numbered prefixes PxPLUS will use in the search. (While scanning PREFIXes 0 to 9, PxPLUS ignores any PREFIX that is DISABLEd.)
Note that the initial check for PROGRAM cache checks for a match against the original file names. Thus, if you used CALL „ABCD“ and you had previously loaded a program with the same name, PxPLUS would use the one in cache. This eliminates the directory searches involved, but if you have duplicate program names in your system, it is possible to get the wrong one, for instance, if you CALL „ABCD“ and then change your directory / prefix and re-CALL „ABCD“. If this happens for duplicate program names in your system, either clear the CACHE or don’t use it.
PERFORMANCE
Another thing you should avoid is to add the drive letter in front of the pathname if the current drive is the same as the drive letter in the PREFIX.
SETDRIVE „C:“ ! mostly this is the default
PREFIX „C:/myapp/data/ C:/myapp/files/ D:/mydir/somedir/ C:/pvx/lib/“
Better is :
SETDRIVE „C:“
PREFIX „/myapp/data/ /myapp/files/ D:/mydir/somedir/“
First, you don’t need /pvx/lib in your searchpath. Every PxPLUS utility or PxPLUS subdirectory can be found using the * prefix. i.e. CALL“*web/email“
Second, by leaving out the drive letter, PxPLUS doesn’t have to check if the drive exists, and thus you’ll have a big performance gain.
If possible, put the path with a different drive letter at the end of the search path.
Konvertieren nach PxPLUS
Für die Konvertierung bestehender Business BASIC Anwendungen bieten wir verschiedenen Konvertierungsprogramme an.
Jede PxPLUS -Lizenz beinhaltet die notwendigen Konvertierungsprogramme.
Sie finden diese Programme unter \pvx\lib\
| Thoroughbred im Verzeichnis: | _conv.tbd |
| MAI Open BASIC im Verzeichnis: | _conv.ob |
| BBx / (V)Pro5 im Verzeichnis: | _conv.bbx |
| MicroShare Basic im Verzeichnis: | _conv.msb |
In der ‘HELP’ Datei finden Sie sämtliche Erklärungen für den Konvertierungsvorgang.
Für BBx Konvertierungen gibt es neuere Konvertierungsprogramme. Diese sind in der ‘HELP’ Datei noch nicht erfasst. Wir wollen diese Programme einzeln erläutern.
GUI_CV
ist ein PxPLUS Programm mit dem BBx Programme und Dateien ohne BBx bzw. (V)PRO5 konvertiert werden. Die Bedienung erfolgt grafisch und bietet folgende Auswahl:
- Konvertierungstestlauf
- Aufzeichnung in der ‘Log’-Datei von:
- Programm- oder Dateiname
- Programmzeile mit dem Zeichen $0A$
- Name der Dateien, die andere als ASCII-Zeichen beinhalten
- Zeilen in der Datei, die andere als ASCII-Zeichen beinhalten
- Warnungen
- Erweiterungen für die ‘Log’-Dateien; JA oder NEIN
- Variable Datenfeldlänge; JA oder NEIN
- Dateibeschränkung auf die Zahl der Datenfelder; JA oder NEIN
- Konvertierung der ‘String’-Dateien; JA oder NEIN
- Auswahl der Datenfeldtrennung mit $0a$ oder $8A$
- Programm OEM nach ANSI Konvertierung
- Datei OEM nach ANSI Konvertierung
CV_NOBBX
ist ebenfalls ein ProvideX-Konvertierungsprogramm, jedoch ohne grafische Bedienung. Auch hier ist für die Konvertierung BBx bzw. (V)PRO5 nicht erforderlich.
CONVDATA.BBX
Dieses Programm finden Sie in dem Verzeichnis *TOOLS. Ausser DIRECT, SORT und MKEYED Dateien werden mit diesem Programm auch INDEXED Dateien konvertiert.
Die Konvertierung läuft wiederum ohne das BBx bzw. (V)PRO notwendig ist.
READ BBx Files
Mit ProvideX, ab Version 4.20, können BBx Dateien direkt gelesen werden (nicht geschrieben). Sie brauchen die entsprechende ProvideX-Erweiterungslizenz “Package 20010″.
LOADBBX
ist ein ProvideX-Befehl, mit dem Sie ein BBx Programm laden und anschliessend unter PxPLUS laufen lassen können. Eine Konvertierung findet automatisch, während das Programm geladen wird, statt. Der Befehl befindet sich in der Datei *cmd.
Syntax: LOADBBX str1{,RAW} (Leerzeichen direkt hinter LOADBBX)
‘str1′ (Pfad+) Dateiname eines BBx-Programmes
‘RAW’ damit werden BBx Funktionen und Befehle nicht in PxPLUS -Format umgewandelt.
Achtung: user_lex Einstellung bleibt gültig.
BBx, PRO5 und VPRO5 sind eingetragene Warenzeichen von BASIS International.
PxPLUS ist ein eingetragenes Warenzeichen von PVX PLUS Technologies.
Geschwindigkeitsprobleme mit WindX?
Verwenden Sie WindX-Arbeitsplätze (PC’s mit WindX) an einem UNIX Host mit einem UNIX- ‚login‘? Dann lesen Sie bitte weiter…
Dieses Dokument erklärt, wie man die Leistung eines WindX-Arbeitsplatzes verbessert, OHNE Verwendung des Standard UNIX-Login.
WindX nimmt Gebrauch von einer normalen Telnet-Verbindung, wie sonst irgendein LAN-Client im Netz mit einem UNIX-Host. Bestimmte Zeichen aus der 256-Byte ASCII-Tabelle sind Steuerzeichen für die Telnet-Verbindung. WindX-Clients und PxPLUS am Host müssen ständig Telnet-Zeichen übersetzen, damit diese besonderen Telnet-Zeichen nie im Datenfluss enthalten sind. Dieser Übersetzungsaufwand (auf beiden Seiten) resultiert in merkbarem Geschwindigkeitsverlust.
Es gibt allerdings noch eine andere, bessere Art WindX-Clients mit einem UNIX-Host zu verbinden. PxPLUS, sowie auch WindX-Lizenzen, beinhalten Programme, die ohne Verwendung eines UNIX-Login die Verbindung zwischen WindX und UNIX schaffen. Es sind die PxPLUS *nthost und *ntslave Programme.
Nachfolgend erklären wir Ihnen, was zu tun ist, um eine “ nthost/ntslave “ Verbindung zwischen WindX und UNIX zu kreieren. Hier wird die Telnet-Verbindung nicht benutzt. Das resultiert in einer bedeutenden Geschwindigkeitsverbesserung.
Bitte beachten Sie, dass sämtliche IP-Adressen und Datei-Pfadnamen reine Beispiele sind und gegen die jeweiligen IP-Adressen und Pfadnamen Ihrer Installation ausgetauscht werden müssen.
Sichern Sie folgenden Skript in /usr/local/bin/starthost auf der UNIX Machine:
#!/bin/sh
PVXLIB=/pvx/lib
TERM=winterm
PVXSTART=*startup # oder was immer Ihr PVXSTART sonst verwendet
export PVXLIB TERM PVXSTARTUP
umask 0
cd /pvx
/pvx/pvx \*nthost -arg 20000 user 0 >/dev/null </dev/null 2>&1
Verwenden Sie ‚chmod 777‘ für ‚rwx‘ Erlaubnis, damit jeder Zugriff auf den Skript /usr/local/bin/starthost hat.
‚20000‘ ist die Socketnummer vom Host-Prozess zur Überwachung der WindX-Verbindungen.
‚user‘ ist der Login-Name für ‚/etc/passwd‘:
Dieser Benutzer ( bzw. der Benutzer Ihrer Wahl) muss in /etc/passwd vorhanden sein und muss in der Lage sein PxPLUS zu starten.
Sämtliche WindX-Anwender werden unter DIESEM Namen im UNIX System geführt.
Die PxPLUS WHO Funktion wird diesen Namen zurückmelden.
In /etc/inittab des UNIX-Systems geben Sie bitte folgende Zeile ein:
Pvx1:234:respawn:/usr/local/bin/starthost </dev/null >/dev/null 2>&1
Anmerkung: Für SCO OpenServer 5 empfehlen wir die Eingabe unter der INITTAB Zeile die mit ‚r3‘ beginnt. SCO wird diese Zeile nach jedem Neuaufbau des Kernels wieder entfernen (zum Beispiel immer nachdem ein neuer Kernel gelinked wird).
Sichern Sie /etc/initttab und geben Sie folgendes ein: ‚telinit q‘
Sie starten damit ein PxPLUS -Host-Programm auf der UNIX Maschine (unter Socketnummer 20000). Dieses Programm wartet jetzt auf die jeweiligen *NTSLAVE WindX-Verbindungen.
Beachten Sie bitte, dass einige UNIX-Systeme erst neu gestartet werden müssen, damit der neue Eintrag in /etc/inittab berücksichtigt wird.
Im Linux OS gibt es keine inittab datei.
Sie können das folgende machen:
1. Es gibt ein /etc/init.d/boot.local Skript.
Fügen Sie die folgende Zeile zu in diesem Skript:
sudo -uuser /usr/local/bin/starthost &
2. Es gibt ein /etc/rc.d/rc.local Skript.
Fügen Sie die folgende Zeile zu in diesem Skript:
su user -c /usr/local/bin/starthost &
Am WindX-Arbeitsplatz (Windows PC) erzeugen Sie eine neue ‚Verknüpfung‘:
Ziel: C:\PVX\Pvxwin32.exe *ntslave -ID=T99 -arg 192.2.9.10 „“ 20000
Arbeitsverzeichnis: C:\Pvx
Ausführen: Minimiert
192.2.9.10 ist ein Beispiel der UNIX IP Adresse
20000 (als Beispiel) für die Socketnummer des Hostprozesses, definiert in /usr/local/bin/starthost.
-ID=T99 ist der Wert von PxPLUS FID(0) auf der UNIX Maschine.
„“ ist der Programmname (die Anwendung) der gestartet wird, nachdem die Verbindung zustande kommt. Mit „“ (ohne Programmname) wird PxPLUS im Konsole-Mode gestartet.
Mit CALL „*windx.utl;spawn“ starten Sie PxPLUS Sub-Routinen. (Mit START können Sub-Routinen nicht gestartet werden.)
WebServer Lizenz
Offensichtlich ist die Lizenzierung des PxPLUS WebServers nicht ganz klar.
Den PxPLUS WebServer sollte man als PxPLUS Anwendung verstehen.
Den PxPLUS WebServer bestellen Sie entweder als Zusatz (Add-on) zu einer [bestehenden] PxPLUS Lizenz oder der WebServer kommt mit dem neuen PxPLUS E-Commerce Bundle.
Die User-Zahl der PxPLUS Lizenz bestimmt die Anzahl der WebServer-Tasks. Das heisst, eine 10-User PxPLUS (oder E-Commerce Bundle) Lizenz kommt mit zehn WebServer-Tasks. Diese Tasks werden auch PxPLUS WebServer-Task-Händler genannt.
Was ist ein WebServer-Task-Händler ? Wieviele dieser Tasks sind erforderlich ?
Jede WebServer Anfrage (request) wird einem Task-Händler zur Bearbeitung übertragen.
Mit einer Einzel-User PxPLUS Lizenz (oder Einzel-User E-Commerce Bundle) wird auch nur ein WebServer-Task-Händler aktiviert. Sämtliche Anfragen werden von diesem WebServer-Task-Händler jeweils nacheinander abgearbeitet. Erst nach Abarbeitung (oder Time-Out) der ersten Anfrage wird die nächste Anfrage bearbeitet. Und so weiter.
Haben Sie eine Zwei-User Lizenz, dann haben Sie ebenfalls zwei WebServer-Task-Händler. Der WebServer überträgt die erste Anfrage dem ersten Task-Händler zur Bearbeitung; die zweite Anfrage wird von dem zweiten Task-Händler bearbeitet. Die dritte Anfrage wird von dem zuerst fertigen Task-Händler bearbeitet. Das heisst, Task-Händler laufen paralell. Mehrere Task-Händler bearbeiten Anfragen dementsprechend schneller.
Nachdem der WebServer wie jede andere Anwendung gestartet wird, wird die Zahl der lizenzierten Task-Händler zur Bearbeitung von Anfragen bereitgestellt. Sind keine Anfragen da, warten die Task-Händler auf eingehende Anfragen.
PxPLUS and ASCII-text files
PxPLUS has 9 ways to write to string files.
There are 3 ways to OPEN the file:
- OPEN (1) FILE$
- OPEN (1,ISZ=1) FILE$
- OPEN(1,ISZ=n)FILE$, where n>1.
And there are 3 commands to fill it:
- WRITE
- WRITE RECORD
It depends on the combination you use, what PxPLUS will append to each record.
| OPEN (1) | OPEN (1,ISZ=1) | OPEN (1,ISZ=n) n>1 | |
| 0D0A | 0D0A | 0D0A000000… | |
| WRITE | 8A0D0A | 8A | 8A0000000000… |
| WRITE RECORD | 0D0A | Nothing | 000000… till LEN=n |
So if you want that nothing gets appended to your data, you have to OPEN your file with option ISZ=1 and use WRITE RECORD to write the data.
- OPEN (1)
PxPLUS does a pre-scan on the first line of a serial file. When a character is found outside the range of a “ “ (space) through a „~“, PxPLUS considers the file a binary file and then the rules of ‚OPEN (1,ISZ=1)‘ apply.
You will have to LOCK the file before you can write to the file.
PxPLUS will handle the file in a record oriented way.
The IND() function returns the current record number.
- WRITING
PxPLUS will always append $0D0A$ (1)to the end of a record.
In case of a WRITE verb, an extra field separator ($8A$) (2) will be appended, before the record separator ($0D0A$)
- READING
A ‚READ RECORD‘ scans the data in the file for a $0D0A$ byte combination.
A ‚READ‘ implies a ‚READ RECORD‘. The data from the ‚READ RECORD‘ is then parsed into the variables, where $8A$ acts as fieldseparator.
A ‚READ (1,IND=n)‘ reads the n+1th record.
1 Record Separator
If running under Windows, the record separator is $0D0A$
When running under UNIX, the record separator is $0A$
In my examples, $0D0A$ is used.
2 Field Separator
The default field separator is $8A$, but can be changed to something else with the ‚FS‘ parameter.
- OPEN (1,ISZ=1)
Opening a file with ‚,ISZ=1‘, opens the file in BINARY mode, even if you open a KEYED file with ‚,ISZ=1‘, PxPLUS will treat the file as if it was a binary file.
For compatibility reasons with other Business Basics, ‚ISZ= -1‘ is allowed.
This mode of OPEN, implies a LOCK to the file.
PxPLUS will handle the file in a byte-oriented way.
The IND() function returns the current byte count.
- WRITING
PRINT X$ writes X$+$0D0A$
WRITE X$ writes X$+$8A$
WRITE RECORD X$ writes X$ and adds nothing to the variable, but if the variable is empty, a $00$ byte will be added.
- READING
Normally you will read the file with READ RECORD(1,SIZ=nnn)X$
Otherwise, ‚SIZ=1‘ is taken.
A ‚READ(1,IND=n)‘ reads the n+1th byte.
- OPEN (1,ISZ=n) where n>1
Watch out for this kind of file access.
Always test your application if you use this kind of approach
- WRITING
A ‚PRINT‘ writes the variable(s) to the file. Each PRINT is terminated by $0D0A$.
Consecutive PRINTs can be performed. No field separator between two fields.
When the n bytes are reached, an ERROR #1 is generated.
When the n bytes are not reached, the rest of the n bytes are filled with $00$
A ‚WRITE‘ writes the variable(s) to the file. A field separator ($8A$) will be appended after each field. The rest of the n bytes will be filled with $00$.
A ‚WRITE RECORD‘ writes the data to the file. The rest of the n bytes will be filled with $00$
- READING
A ‚READ‘ implies a READ RECORD of n bytes. The data found will be parsed into variables.
A ‚READ RECORD‘ reads n bytes (n = specified by OPEN)
A ‚READ RECORD (1,SIZ=x) will read x bytes.
- Tip: Do not mix PRINT, WRITE, and WRITE RECORD to fill a file.
Summary
- If you want to fill a serial file with the purpose to merge back the data:
|
WRITE PROCEDURE |
READ PROCEDURE |
SERIAL F$ OPEN LOCK (1) F$ PRINT (1)"10 REM" PRINT (1)"20 BEGIN" PRINT (1)"30 FOR I=1 to 10" PRINT ... PRINT (1)"9999 END |
CLOSE (1) OPEN (1)F$ MERGE (1) |
- If you want to have full control:
They impose a certain format: the record must be 128 chars long, plus a ‚TAB‘ (hex09) as separator.
|
WRITE PROCEDURE |
READ PROCEDURE |
SERIAL F$ OPEN (1,isz=1) F$ DIM X$(128) X$(1)=SOME_CODE$ X$(25)=OTHER_STUFF$ ... X$=X$+$09$ WRITE RECORD (1)X$ ... |
OPEN(1,isz=1)F$ GET: READ(1,siz=129,end=DONE)X$ GOTO GET DONE: |
- If you want to write variables to a serial file with the purpose to read them back in:
|
WRITE PROCEDURE |
READ PROCEDURE |
SERIAL F$ OPEN LOCK (1) F$ PUT: A$= ... , B$= ... , C$= ... WRITE (1)A$,B$,C$ GOTO PUT |
OPEN (1) F$ GET: READ(1,end=DONE)X$,Y$,Z$ GOTO GET DONE: |
Sample program
0010 BEGIN ; PRINT 'CS','SB'
0020 FOR I=1 TO 2
0030 LET F$="c:\tmp\erase.me"; ERASE F$,ERR=*PROCEED; SERIAL F$
0050 !
0060 IF I=1 THEN OPEN LOCK (1)F$; PRINT "OPEN (1) "
0070 IF I=2 THEN OPEN LOCK (1,ISZ=1)F$; PRINT "OPEN(1,ISZ=1)"
0080 !
0090 PRINT (1)"111"
0100 WRITE (1)"222"
0110 WRITE RECORD (1)"333"
0130 PRINT (1)"444"
0140 WRITE (1)"555"
0150 WRITE RECORD (1)"666"
0160 !
0170 CLOSE (1); OPEN (1,ISZ=1) F$
0180 READ RECORD (1,SIZ=-1000) X$
0190 PRINT 'LF',"Binary file contents: ",'LF','LF','SF',HTA(X$),
0200 !
0330 CLOSE (1)
0331 PRINT 'SB','LF'
0340 NEXT I
Link Files and Device Drivers
Was sind Link Dateien ?
Eine Link Datei ist eine PxPLUS Datei mit der ein ALIAS‘-Name erstellt wird, um ein bestimmtes Gerät mit einem Gerätetreiber anzusprechen.
So eine PxPLUS Link Datei ist eine einfache Datei mit drei Teilen:
– der Header‘, an dem PxPLUS diese Datei als Link Datei erkennt,
– der Name der anzusprechenden Datei,
– der Name des anzusprechenden Gerätetreibers.
Also ganz gewöhnliche, meist kleine Dateien mit Daten. Beachten Sie, dass unter UNIX der Dateiname von Gross- oder Kleinbuchstaben abhängig ist. Unter DOS/Windows ist die Schreibweise egal.
PxPLUS kennt drei verschiedene Link Dateien mit jeweils entsprechenden verschiedenen Header [PVXLNK], [PVXDEV] und [PVXAPR]. Abhängig von den Headern, reagiert PxPLUS entsprechend.
Eine kurze Anmerkung zu Headern:
Sämtliche PxPLUS Dateien haben einen Header wie [PVXKEY] für Keyed Dateien und [PVXIND] für Indexed Dateien.
Beim Öffnen einer oder mehrerer Dateien liest PxPLUS zunächst die ersten 512 Bytes und prüft den Inhalt auf „[PVX“. Wird „[PVX“ gefunden, erkennt PxPLUS , dass eine eigene Datei gefunden wurde. Wird „[PVX“ nicht gefunden, erkennt ProvideX, dass es sich um irgendeine andere Datei oder eine ASCII Datei handelt. Bei einer Keyed Datei [PVXKEY] erkennt PxPLUS wie eine Keyed Datei gelesen wird.
Auch Link Dateien werden als solche erkannt und werden von PxPLUS entsprechend abgearbeitet. Mit dem Lesen der ersten 512 Bytes ist die gesamte Link Datei gelesen und im Speicher abgelegt. Anschliessend an die ersten acht Positionen [PVXLNK] oder [PVXDEV] oder [PVXAPR] werden nun die zwei weiteren Teile der Link Datei gelesen;
Von Position 9, 60 Positionen lang: Der Name der anzusprechenden Datei,
Von Position 69, 12 Positionen lang: Ein CALL‘ mit dem Namen des anzusprechenden Gerätetreibers.
Folglich schliesst PxPLUS die Link Datei und öffnet die zweite Datei im selben Kanal unter Beibehaltung des Namens der Link Datei. Danach wird der Gerätetreiber mit einem CALL geöffnet. PxPLUS setzt ein *dev/ automatisch vor den Gerätetreiber, damit das System den Gerätetreiber immer aus dem Verzeichnis lib/_dev‘ liest.
Wichtig bei der ganzen Sache ist, dass
1) Die zweite Datei existiert und geöffnet werden kann,
2) Der Gerätetreiber im Verzeichnis *de vorhanden ist und gelesen werden darf.
Eine Link Datei arbeitet wie ein ALIAS‘ zu einer weiteren Datei und kann wie mit einem Verweis zu einem Gerätetreiber betrachtet werden.
Mit Hilfe des Dienstprogrammes *ucl können Link Dateien, einschliesslich der notwendigen Verknüpfungen mit der ALIAS‘ Datei und dem Gerätetreiber, erstellt werden. Man kann ausserdem eine Link Datei als einfache Textdatei selbst schreiben und abspeichern. Link Dateien sind nur das: einfache Textdateien.
Mit [PVXLNK] wird die Verbindung zu einer weiteren Datei erstellt ohne einen Gerätetreiber anzusprechen. Zum Beispiel zu einer bereits bestehenden Kundendatei irgendwo auf der Platte oder irgendein anderes Verzeichnis oder sogar zu einer anderen Platte im System. Die Link Datei KUNDEN findet damit immer die Datei F:\Daten\Kunden wohin man die Datei\Kunden auch immer unterbringt und zwar ohne irgendwelche Änderung im Programm.
Mit [PVXDEV] kann man irgendeine andere Datei öffnen und einen Gerätetreiber aufrufen. Diese wird eingesetzt für Drucker.
Mit [PVXAPR] werden zum Beispiel Bildschirmdrucker angesprochen. PxPLUS öffnet den entsprechenden Schnittstelle und ruft den entsprechenden Gerätetreiber auf.
PxPLUS schickt ein Mnemonic PS‘ zum Drucker und schliesst den Vorgang mit PE‘.
Beispiele:
Siehe auch die Tech-Tips Drucken’
PRINTING with PxPLUS
With PxPLUS for Windows, there are two print devices :
*WINPRT* and *WINDEV*
Both devices use the Windows‘ spooling system.
With *WINPRT*, the job will be interpreted by the Windows‘ print API, and then passed on to the printer driver, building the final file which is queued up and sent to the printer.
*WINDEV* is a special interface to the Windows Print spooler which implements a ‚PASSTHROUGH‘ mode allowing you to send escape sequences directly to a printer.
This provides an interface similar to opening ‚LPT1‘ directly.
Note:
*WINPRT* is your only choice to print ‚fonted scalable text‘, images, boxes, lines, etc. along with plain text.
*WINDEV* is your only choice to send printer specific ‚escape-sequences‘ along with a text to the printer but will not support any GUI Mnemonics.
Example 1
OPEN (1) „*WINPRT*
….<snip>….
PRINT (1) ‚FONT'(FONT$,int(C*.8)),
PRINT (1) ‚TEXT'(@x(X+66.5),@y(Y+.5),@x(X+75),@y(Y+2),FC$),
PRINT (1) ‚PEN'(1,4,0),
PRINT (1) ‚RECTANGLE'(@x(MX),@y(MY+5),@x(MX+20),@y(MY+7)),
Example 2
OPEN (1) „*WINDEV*“
PRINT (1) ‚BO‘,ESC+“(s12H“,’EO‘, ! HP Laser 12 cpi mode. Do not use ‚BO’+ESC….+’EO‘
PRINT (1) TXT$
When you open the Windows‘ spooler with either *WINPRT* or *WINDEV* you can specify a series of options separated by semi-colons following *WINxxx* in the path name.
By default, as if you just issue an
OPEN (1) „*WINPRT*“
PxPLUS will pop-up the standard Windows‘ printer selection box and let you choose which printer you want to use along with various properties such as orientation, copies, print to file, etc.. The printer and properties selected will remain current throughout the rest of the PxPLUS session.
To force the assignment of a specific printer, place such printer name following the *WINPRT*, separated by a semi-colon:
OPEN (1) „*WINPRT*;Epson FX-80 on \\server1\queue1“
This will open an Epson FX-80 printer (as per the Windows control panel) on \\server1\queue1.
There are also a couple of special queue names: „ASIS“ and „DEFAULT“.
„ASIS“ will open the printer with exactly the same settings from the prior print job, and „DEFAULT“ opens the printer queue which is currently „set as default“. Neither of these will display the printer selection dialogue.
OPEN (1) „*WINPRT*;ASIS“
To find out the names of all the configured printers in the system use the directive:
WINPRT_SETUP LIST X$
This will place a list of all configured printers into X$ (comma separated).
To find the current selected printer:
WINPRT_SETUP READ X$
To change the current selected printer:
WINPRT_SETUP WRITE „Epson FX80 on \\server1\queue1“
To set printer properties, add the properties following the printer name, separated by semi-colons such as:
OPEN (1) „*WINPRT*;Epson FX80 on \\server1\queue1;ORIENTATION=LANDSCAPE;COPIES=3“
or
OPEN (1) „*WINPRT*;;ORIENTATION=LANDSCAPE“
- Note the double semi-colons with the second statement.
To determine the current selected printer properties:
WINPRT_SETUP READ PROPERTIES P$
To set the current printer properties:
WINPRT_SETUP WRITE PROPERTIES P$
One of the printer properties is OFFSET.
The OFFSET, if returned, will be in 1/1000″ of an inch. However, the margin size is not something PxPLUS can retrieve. Therefore there may be some variation to the margins between different printers.
The following command will set a 1/2 inch left margin and a 3/4 inch top margin:
WINPRT_SETUP WRITE PROPERTIES „OFFSET=500:750“
This provides pretty accurate x and y coordinates for the page. In the event that margins shift around in your report, add some code for different printers in order to move the OFFSET around. Adjusting the OFFSET can compensate for different margin sizes. OFFSET can be specified with positive and negative values.
To get the list of available fonts:
OPEN (1) „*WINPRT*“ (Printer must be opened first)
F$= ‚FONT‘ ( LIST *, channel )
PRINT F$ (Prints list of fonts, comma separated)
Find out about the font sizes of a certain font and check whether this font can be printed by:
S$=’FONT‘ (LIST „Arial“ ,channel)
From this list of font sizes, set the default font with:
PRINT (channel) ‚FONT'(<font name>,<font size>),’DF‘,
PRINT (channel) ‚FONT'(„Arial“,-10),’DF‘,
Be aware of the negative size value.
A negative size means: use that point size
A positive size means: use this factor relative to the default size.
PRINT (channel) ‚FONT'(„Arial“,0.75),’DF‘,
With this option, the font size can be increased or decreased and increases or decreases the number of print positions.
PRINT (channel) ‚FONT'(„Arial“,mxc(channel)/<positions_required>),’DF‘,
Be careful with the point sizes of the fonts. Rounding to the nearest „supported“ point size will occur. For example: If you specify a point size of 1.5, Windows will round this to a size it supports. The print driver will also influence the point size rounding.
MXC() and MXL() return different values when a default font size from different printers has been forced.
ont-size: small;“>The values will vary from one printer to the next. It will vary based upon the supported fonts or font sizes for the printer driver, as well as the margins and offsets currently set for the driver. It will also vary based upon the paper size and orientation (landscape vs portrait) for that printer. We have never seen the exact same col/row values yet when switching between different printers/printer drivers. This is why we recommend that the logic should dynamically adjust the size, until you get the minimum number of cols/rows, required for the report. However your report may vary slightly in size during output.
A lot of such instructions are implemented in our sample program „fontpick“.
Windows will add a form feed to the end of a job, whether you send it through *WINPRT* or through *WINDEV*. Therefore, whenever you close the printer, the job will end, and a form feed is produced.
To print directly to the printer, open ‚LPT1‘ directly. However, we advise to use an UNC (Universal Naming Convention):
OPEN (1)“\\server_name\printer_name“
If PRINT causes an error 13, add a LOCK(1) to your code right after the OPEN.
To make your report look the same on every printer, the two mnemonics ‚CPI'() and ‚LPI'() can be of help.
Add a number (per inch) to force the @X() @Y() locations to be more exact and independent from the selected default font.
For example:
OPEN(1)“*WINPRT*“
PRINT (1)’FONT'(„Courier New“,-10),’df‘,
PRINT (1)’CPI'(10),’LPI'(6),
The first print statement forces the printer to a specific font, and recalculates the number of columns and rows the print driver will support per page for this printer.
The second print line forces 10 characters to the inch, and 6 lines to the inch. This does NOT change the default font, but it changes PxPLUS internal calculations of the column and row to real pixel coordinates. In this example, a print @x(0) would be up against the left margin of the page, while @x(10) would be exactly 1 inch from the left margin, @x(20) would be 2 inches from the left margin and so on. The same applies to @y() in relation to the ‚LPI'().
However, the coordinates determine the printable area of the page. Therefore the differences from one print driver to the next can have an impact on margins and offsets.
Questions & Answers
Q: When printing with „*winprt*“ is there a way to abort the printing by an instruction and remove the current print job from the print spooler?
A: Adding an ‚AB‘ mnemonic to the *WINPRT* channel will abort the current document while
Q: In Windows, how do I determine which printer is set as the current printer?
A: You could do something like:
WINPRT_SETUP READ A$
and A$ will contain the name of the open current printer.
Q: In Windows, how do I determine which printer is set as the default printer?
A: Windows stores the Default Printer in the WIN.INI file. To find out what it is, you can use the *INIFILE Utility to read this value:
CALL „*INIFILE;READ“,“WIN.INI“,“Windows“,“Device“,““,default_prt$,80
PRINT default_prt$
Q: How can I access local printers from a WindX Workstation?
A: To access a Printer on the local WindX PC, insert „[WDX]“ in front of the Print Name.
For example:
OPEN (1)“[WDX]*WINPRT*“
or OPEN (1)“[WDX]*WINDEV*“
or OPEN (1)“[WDX]LPT1″
Q: How do I know when I am in WindX so I can print to local printers ?
A: We recommend that you set a global variable if WindX is running. Add a line like this to your startup program:
IF MID(MSE,22,1)>$00$ AND MID(MSE,22,1)<$FF$ THEN %WDX$=“[WDX]“
Then, where you open the printer, add:
OPEN(CHAN)%WDX$+“*WINPRT*“
The %WDX$ variable will get a value only when running WindX, if not the variable will be empty.
Q: How can I open and close the printer without printing a ‚Form Feed‘ ?
A: OPEN INPUT (chn) „*WINPRT*“
This will allow you to open the printer but not start any document. In fact, it simply tests whether the printer is present and determines which fonts are available using the ‚FONT'(LIST *,chn) function.
The INPUT clause indicates that the printer is in ‚Query‘ mode only. After all, it is hard to print to an input only device.
Q: How can I ‚right justify‘ columns ?
A: The ‚JR‘ and ‚JD‘ mnemonics work with fixed length outputs. Which means, when sending numeric data, the output is formatted using a consistent format mask.
‚JR‘ takes the length of the following string and determines whether the end-point is based upon fixed length printed output. Just like printing 10 characters at 10 CPI, the printed width must be right justified within one inch. Once the length of the field is determined and the end point is computed, PxPLUS subtracts the true length of the printed text based upon the proportional font chosen to determine the start point for the text. The result is right justified output assuming all the fields are the same length.
‚JD‘ is a variation thereof and is based upon numeric output. Instead of computing the end-point it computes the location of either the last digit or the decimal point. For example if you print 1234.56 with the format mask (###,##0.00), PxPLUS computes the location of the decimal point. PxPLUS takes the number of characters in front of that point (8 in the above example) and multiplies the logical CPI resulting in 8/10ths of an inch. PxPLUS , then subtracts the actual size of the first eight characters from the output as per the proportional font selected and uses this as the start point for printing the complete output. The net result is that the final digit and/or decimal point will always be aligned in the same position assuming a consistent format mask. A trailing sign, ‚)‘, ‚CR‘, or ‚DB‘ will not effect the alignment.
It is important to remember that with both the ‚JR‘ and ‚JD‘ mnemonics, the output must always be the same length, that is, numeric data MUST be printed using a format specification.
Please note that a standard PRINT (channel) <num_value>:“##,##0.00″, without any justification, will always be formatted with the ‚JL‘ mnemonic.
Also remember …..
PxPLUS prints with two different printing planes. One for Text and one for Graphics. Fonted text is printed on the graphics plane. The graphic plane lays on top of the text plane.
The one exception to this is the ‚FONT'() followed by a ‚DF‘, which sets the font height and width of the characters printed on the text plane. All plain print commands will then use this text font and size on the text plane until you issue another ‚FONT'() followed by a ‚DF‘. This of course, re-adjusts the character size of the text plane.
Remember also that the X and Y coordinates for each column and row are based upon the cell size of the text plane.
All other ‚FONT‘ () commands affect the graphics plane. To place text on the page in the graphics plane, you need to use a ‚TEXT'() mnemonic. A regular print command with no ‚TEXT'() mnemonic places text on the text plane.
A common way to print is to open the printer. Print a ‚FONT'() which has a specific point size (negative size value) and a ‚DF‘. Then you can print around the page on the graphics plane, printing ‚FONT'() and ‚TEXT'() mnemonics to get your different looks to each string.
Invalid activation
Schon mal diese Fehlermeldung gesehen ?
Wenn ProvideX Dateien auf anderen Stellen der Harddisk kopieren werden, erscheint die Fehlermeldung „Invalid Activation“.
Mit der ursprünglichen Aktivierung wird eine Directory kreiert: /pvx/lib/keys.
Daher sollte die ursprüngliche Aktivierung auf der Harddisk bleiben wo sie ist.
Es gibt zwei Möglichkeiten zur Beseitigung des Problems:
1) In der Directory „/pvx/lib/keys“ löschen Sie die Datei „activate.pvx„.
Starten Sie das Aktivierungs-Programm unter Verwendung des bereits vorhandenen temporären Aktivierungs-Schlüssels.
Starten Sie ProvideX.
Nach erfolgreichem Start, ProvideX mit dem vorhandenen permanenten Aktivierungs-Schlüssel aktivieren.
2)Löschen Sie die Directory: ‚keys‚
Starten Sie das Aktivierungs-Programm und verwenden Sie den vorhandenen temporären Aktivierungs-Schlüssel.
Sie haben jetzt eine neue System-Id. erzeugt.
Mit den folgenden Daten erhalten Sie von unserem Vertriebsbüro einen neuen permanenten Aktivierungs-Schlüssel:
Serien Nummer
System Id.
Maschine Klasse
Zahl der User.
Bitte beachten: Acktivierungs-Schlüssel erhalten Sie nicht von unserer Support- Gruppe, sondern ausschließlich über unser Vertriebsbüro. Telefonnummer für Kunden aus Deutschland: 06122-80040.
ProvideX Updates
Besuchen Sie regelmässig unsere web site (www.edias.com) und holen Sie die jeweils neueste Version von ProvideX. Installieren Sie immer die neue Version auf derselben Stelle, auf der die alte Version von ProvideX installiert war. Damit wird die neue Version automatisch, ohne Neuaktivierung, installiert.
POS Funktion
Die POS Funktion unterschätzt ?
Betrachten Sie bitte folgendes Beispiel:
0010 begin
0020 dim A[1:5],A$[1:5]
0030 let A$[1]="alfa "
0040 let A$[2]="bravo "
0050 let A$[3]="charlie "
0060 let A$[4]="delta "
0070 let A$[5]="echo "Leerstellen für die bessere Lesbarkeit
0075 print A${all}
0080 let A{all}=pos("a"=A${all})
0090 print A{all}
0100 let A{all}=pos("a"=A${all},1,0)
0110 print A{all}

Die Numerische-Reihe erhält das Ergebnis der 'POS' Funktion aus der String-Reihe
	A[1]=pos("a"=A$[1])
	A[2]=pos("a"=A$[2])
	.....
	A[n]=pos("a"=A$[n])

Oder wussten Sie:

PRINT POS ( "abc" : "Schere" )
Achten Sie bitte darauf, wir verwenden nicht das "=" Zeichen, sondern einen
'Doppelpunkt'.
Wir suchen die Buchstaben 'a' oder 'b' oder 'c' aus der Reihe 'Schere'.
Das Ergebnis ist die Position in dem der gesuchte Buchstabe zuerst vorkommt. In
unserem Fall finden wir zuerst ein 'c', und zwar an der zweiten Stelle.
Folglich ist das Ergebnis gleich '2'.
Oder:
PRINT POS ( "abc" ^ "Schere" )Wir suchen jetzt die erste Position aus der Reihe  'Schere' in dem der Buchstabe
ungleich mit 'a' oder 'b' oder 'c' ist.
Das ist also die erste Position mit dem Buchstaben 'S'.
Das Ergebnis ist folglich gleich '1'
SELECT
Der PxPLUS Befehl SELECT ist auf den ersten Blick vielleicht nicht ganz so beeindruckend. Nach einiger Erfahrung mit SELECT stellt sich heraus, daß man sich eine Vielzahl von Programmzeilen ersparen kann. Die nachfolgende Routine zeigt die klassische Art, mit der man mit einem Sekundarschlüssel auf ‚Kundennummer‘ im Rechnungsbestand (sale) liest. Mit Hilfe der Rechnungsnummer holen wir uns dann die einzelnen Positionen aus der Datei ’sale_itm‘.
0010 rem TT1A
0020 begin
0030 open (1)"sale"
0040 open (2)"sale_item"
0050 input (0,err=0050)'CS',@(10,10),'SB',"Customer number ",'SF',CUST$
0060 gosub GET_INVOICE
0070 goto 0050
1000 GET_INVOICE: ! ^1000  --------------------------------------------
1010 let K$=CUST$
1020 extract (1,key=CUST$,kno=2,dom=1030)iol=1140; goto 1150
Filepointer direkt vor die Rechnung des gewünschten Kunden setzen.
Lesen mit  kno=2'
1100 READ_INVOICE: rem ^100
1110 let K$=key(1,end=1180)
1120 if K$(1,5)>CUST$ then goto 1180
Lesen bis Dateiende oder bis zur letzten
Rechnung der von uns gewählten Kundennummer.
1130 read (1)iol=1140
1140 iolist INVOICE$,DATE$,EXPDATE$,CUSTOMER$,TOTAL,NET,TAX,DISCOUNT
1150 print INVOICE$," ",DATE$," ",CUSTOMER$,TOTAL:"###B###B##0.00-"
1160 gosub GET_DETAIL
1170 goto READ_INVOICE
1180 return
2000 GET_DETAIL: rem ^1000 ------------------------------------------
2010 let D$=INVOICE$
2020 extract (2,key=INVOICE$,dom=2030)iol=2140; goto 2150
Filepointer auf die richtige Rechnung setzen.
2100 READ_DETAIL: rem ^100
2110 let D$=key(2,end=2170)
2120 if D$(1,10)>INVOICE$ then goto 2170
	Die notwendige Kontrolle damit die richtigen Rechnungspositionen gelesen
werden.
2130 read (2)iol=2140
2140 iolist D_INVOICE$,LINE$,PRODUCT$,D_TOTAL,D_NET,D_TAX,D_DISCOUNT
 Sollte  'TOTAL', etc. breits in der ersten IOLIST verwendet sein,
muß jetzt ein anderer Name für die entsprechenden Variablen gewählt werden.
2150 print @(20),PRODUCT$,D_TOTAL:"###B###B##0.00-"
2160 goto READ_DETAIL
2170 return
In der nächsten Routine verwenden wir "SELECT" und die 'embedded iolist'. Diese
Routine hat deutlich weniger Programmzeilen. Viele Programmzeilen aus der
vorherigen Routine sind jetzt überflüssig geworden. Es gibt keine lästigen
 IF..THEN' und  GOTO' mehr. Wir brauchen auch am Anfang keine Dateien zu
öffnen.
0010 rem TT1B
0020 begin
0030 !
0040 !
0050 input (0,err=0050)'CS',@(10,10),'SB',"Customer number ",'SF',CUST$
0060 gosub GET_INVOICE
0070 goto 0050
1000 GET_INVOICE: ! ^1000  --------------------------------------------
1010 !
1020 !
1100 ! ^100
1110 !
1120 !
1130 select * from "sale",kno=2 begin CUST$ end CUST$+$FF$
	Achten Sie, wie wir mit Hilfe der Alternativ-Schlüssel
Zugriff auf die Rechnungsdatei haben.
1140 !
1150 print INVOICE$," ",DATE$," ",CUSTOMER$,TOTAL:"###B###B##0.00-"
1160 gosub GET_DETAIL
1170 next record
1180 return
2000 GET_DETAIL: rem ^1000 ------------------------------------------
2010 !
2020 !
2100 ! ^100
2110 !
2120 !
2130 select *,rec=D$ from "sale_item" begin INVOICE$ end INVOICE$+$FF$
	Um gleichnamigen Variablen zu vermeiden wird der prefix  ,rec=D$' gesetzt'
2140 !
2150 print @(20),D.PRODUCT$,D.TOTAL:"###B###B##0.00-"
2160 next record
2170 return
Weitere Empfehlungen für SELECT sind:
SELECT A$,B$,C$ FROM "filename"
	Selektieren mit Variablen anstelle embedded iolist.
SELECT iol=500 FROM "filename"
	Selektieren mit einer IOLIST
SELECT * FROM 1
	Selektieren einer bereits geöffneten Datei auf Kanal 1
SELECT * FROM "company" WHERE ( lang$="1" and ZIP$>"B")
Datensätze selekti lesen.  Felder ohne Schlüssel mit WHERE selektieren.
X$="lang$="+quo+"1"+quo
SELECT * FROM "company" WHERE EVN(X$)
Datensätze selekti lesen.  Selektieren mit der Funktion EVN()
Mit 'EXITTO' unterbrechen wir eine  SELECT ... NEXT RECORD routine.
Beispiel:
Um einen Kunden löschen zu wollen, sollten wir zuerst prüfen ob noch Datensätze im Rechnungsbestand vorhanden sind. Der Löschvorgang wird sofort unterbrochen sobald nur ein Datensatz gefunden wird.
SELECT * FROM "sale",kno=2 BEGIN cust$ END cust$+$FF$
PRINT "Kunde darf nicht gelöscht werden"
EXITTO NICHT_LÖSCHEN
NEXT RECORD
LÖSCHEN:
mit K$=KEC(LFO)
, erhält man den Schlüssel der gerade mit SELECT gelesen wurde.
© 2014 Alaska Hosting. All rights reserved.